Thursday, October 25, 2012

Task scheduler failed to start “\User_Feed_Synchronization


Added to the "my brain is getting old and I can't remember all this stuff" document  is the tip from Yves Gourle about fixing an alert you might see for
Task scheduler failed to start “\User_Feed_Synchronization-{guid}” task for user “<DOMAIN>\user”
Small Business Server 2008 - Build document - TechNet Articles - Home - TechNet Wiki:
http://social.technet.microsoft.com/wiki/contents/articles/small-business-server-2008-build-document.aspx
TWEAKS FOR REMOVING RSS FEED SYNC
Since a server is probably not syncing RSS feeds, there's a task that runs in the background that is not needed on the server.  In some cases you may see an alert in the event logs that indicate that the rss sync has not completed.  While it can be ignored, you can also adjust the rss feed sync to not occur.   This tip is courtesy of Yves Gourle:
You can disable the automatic feed sync as follows:
  • Run the following command (with a command prompt started with elevated rights) : msfeedssync disable
  • Or in IE options go to content  -feeds and web slices,  click on settings  and uncheck “automatically check for feeds”
Filed under:

src:  http://msmvps.com/blogs/bradley/archive/2010/07/21/task-scheduler-failed-to-start-user-feed-synchronization.aspx

Sunday, October 21, 2012

SQL Server Reporting Services 2008 Installation Tutorial

This article is a step-by-step walk through of SSRS 2008 installation on a virtual machine. If you are going to install SSRS on a physical machine, then the steps are still similar and you can benefit from it.
Environment Check List
To follow the steps, you would need to have the following programs installed and configured on your machine:
  • Have already setup a virtual machine. I am using VMware with Windows XP as guest operating system (if you need help to do this, read article: How to install VMware Player?)
  • Have already installed SQL Server 2008 R2 on your machine (without the Reporting Services)
  • Have already created an ISO image from the installation disk
    (If you need help to do this, read article: How to create ISO disk image?)
If you have the above installed and ready, here are the steps:
1. This first thing we need to do is to boot the virtual machine. Once the guest operating system is on, we have to mount the optical disk drive to the ISO image which we have already created and contains the installation files. To do this, right click on the CD icon located on the bottom right of your VMware Player window box and choose Settings:
image
2. Be default the connection is set to use physical drive. Choose, Use ISO image file and browse to the directory were file is stored then click OK:
image
3. If the ISO image is connected successfully, you will see the file mounted as your CD drive in My Computer window:
image
4. Right Click on the CD drive and choose Open to view the content. Browse to the appropriate folder directory (D:\English\SQLServer2008R2\Developer) and double click on the installation file Setup:
image
5. SQL Server Installation Center will open:
image
6. From the left menu, choose Installation and then click on New installation or add features:
image
7. Setup checks if you have the necessary support files. Click OK:
image
8. Click install:
image
9. The system checks if you have all the required software dependencies. If any of the rules fail for you, then setup will provide a link which contains further instructions. You have to install the prerequisites software before you can proceed. In this case, all rules passed and we click on Next:
image
10. Since we are adding the Reporting Services to an existing instance of SQL Server, we will select the second option and click Next:
image
11. The next window asks to select the new features that we want to add. Select (Tick) Reporting Services & Business Intelligence Development Studio and click Next:
image
12. Another check. Click Next:
image
13. Checking Disk Space Requirement. Click Next:
image
14. Next is server configuration which asks you to associate an Account to use for the Reporting Services. I am choosing SYSTEM (You can also create a separate account), click Next:
image
15. Choose Install, but do not configure the report server and click Next:
image
16. If you want to report errors to Microsoft, then tick the box; otherwise, click Next to continue installation:
image
17. Another check for installation rules. Click Next:
image
18. Setup is almost ready to proceed with the actual installation. Click Install:
image
19. Setup is complete and Reporting Services is added.
image
20. It is time now to configure the Reporting Services. Browse to:
Start > All Programs > Microsoft SQL Server 2008 R2 > Configuration Tools > Reporting Services Configuration Manager and click on it: (we can also see that SQL Server Business Intelligence Development Studio is installed):
image
21. You will be asked to connect to the Reporting Services. Click Connect:
image
22. If the installation is successful, you will be connected. On your left side, there is a menu which you would need to configure few. The first is Service Account, I have left this to the default which is Local Account but as it was mentioned previously, you can specify a separate account. Now go to next, Web Service URL:
image
23. Under the Web Service URL tab, it is best to leave the Virtual Directory name as defaulted to ReportServer. This is common and widely known. Click on Apply to deploy this configuration.
image
24. Under Database tab, Reporting Services store all reports and related information in separate database. Since this is the first time, we do not have them. Click on Change Database to create them.
image
25. Follow the steps in next few screens to create the reporting databases:
image
image
image
image
image
image
26. Now go to the next tab Report Manager URL. Leave the virtual directory as Reports and click on Apply to deploy the configuration. You will see once its done green checks under Results section.
For the purpose of this exercise, I am not going to skip Email Settings but you can add your details there if you want reports to be scheduled and sent to email address. Click on Exit to finish.
image

27. Finally, there are two important URL which allow us to access the Reporting Services:
http://localhost/Reports
(This is where all reports are going to displayed once deployed. It is also the place where users can view and run reports)
http://localhost/ReportServer
(This is the location where reports are going to be deployed to)
To check that everything is done correctly and the installation is successful, to test this, open your internet explorer and type the above URL, you should see this:
image
image

1 Response » to “SQL Server Reporting Services 2008 Installation Tutorial”

  1. [...] 10. If you ticked in the feature’s section to install Reporting Services, then here it will ask you whether to have the default configuration or do installation only and do Reporting Services configuration manually later. For this exercise, I am leaving as the default – to do both installation and configuration. Read the following article if you want to learn how to do configuration manually: Installing and Configuring Reporting Services [...]
     

How to Install SQL Server 2008 Reporting Services

I recently upgraded from Microsoft SQL Server 2005 to Microsoft SQL Server 2008 on my Windows Vista computer.  After successfully installing SQL Server 2008, I could not find the Reporting Services instance installed.  I have a feeling this was due to the fact that I had never installed Reporting Services on the SQL Server 2005, so when I upgraded to 2008 it carried over the previous settings from 2005 and I never got a chance to select Reporting Services during the initial install.  Because of this, I had to add/install the Reporting Services feature seperately to my existing SQL Server 2008 database afterwards.
Follow these steps to install Microsoft SQL Server 2008 Reporting Services (SSRS) to an existing SQL Server 2008 installation.

To install SQL Server 2008 Reporting Services

  1. Insert the Microsoft SQL Server 2008 product DVD into the DVD Drive, and run Setup.exe to open the "SQL Server Installation Center"
  2. In the SQL Server Installation Center window, click "Installation" from the left-hand menu, then click "New SQL Server stand-alone installation or add features to an existing installation".
  3. Now step through the initial setup steps.  Once you get to the "Installation Type" screen choose "Add features to an existing instance of SQL Server 2008", then select your instance and click "Next".
  4. In the Features Selection window, locate "Reporting Services" (It is below "Instance Features"), and check the box next to "Reporting Services", then click "Next".
  5. Click "Next" on the Disk Space Requirements window.
  6. In the Server Configuration window, select an 'Account Name' for Sql Server Reporting Services.  In my case, I choose the local SYSTEM account (I did not have to enter a password). Once you've choosen your 'Account Name' click the "Next" button.
  7. In the Reporting Services Configuration window, choose "Install, but do not configure the report server" and click "Next".
  8. Then click "Next" buttons, until you get to the "Ready to Install" window, and then click the "Install" button. Once the Installation setup process is complete and successfully installed, click "Next", then from the Complete window, click "Close".
  9. That's it!
Before configuring Reporting Services, you may want to make sure that Reporting Services service is installed on your computer, to do so follow these steps: 
Open "Control Panel" -> System and Maintenance -> Administrative Tools -> Computer Management -> expand the "Services and Applications" menu -> click on "Services" -> now locate SQL Server Reporting Services (MSSSQLSERVER) in the Services window pain.
OK, so once you know SQL Server Reporting Services is on your system, you will now have to configure Reporting Services for your computer. To get started with configuration, check out: http://technet.microsoft.com/en-us/library/ms159644.aspx
To configure a URL for the Report Server Web service, check out: http://technet.microsoft.com/en-us/library/bb630447.aspx
To create a Report Server Database for Reporting Services, check out: http://technet.microsoft.com/en-us/library/ms157300.aspx
For more Reporting Services Configuration How-to Topics, check out: http://technet.microsoft.com/en-us/library/ms157412.aspx
Also check out the MSDN Reporting Services forum here: http://social.msdn.microsoft.com/Forums/en-US/sqlreportingservices/threads

src: http://www.gotknowhow.com/articles/how-to-install-sql-server-2008-reporting-services-ssrs

MS SQL Database Backup (Freeware)

src: http://www.satheesh.net/2009/11/19/ms-sql-database-backup-freeware/

November 19, 2009
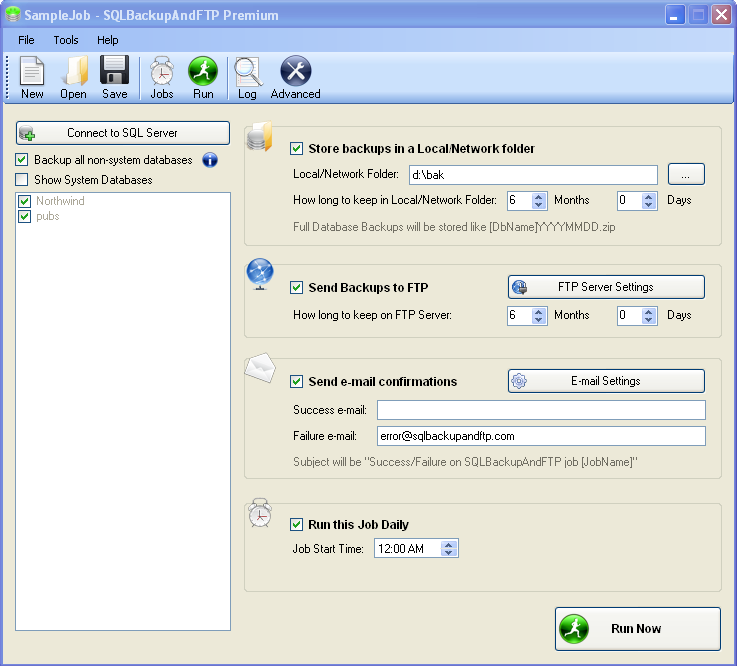
This little software makes making backup of Microsoft SQL databases a breeze. Best of all, it’s freeware!
sqlbackupandftp
SQLBackupAndFTP – get it here -> http://www.sqlbackupandftp.com/

Compatibility:
SQL Server 2012 Express
SQL Server 2008 Express
SQL Server 2005 Express
SQL Server 2012 – all editions
SQL Server 2008 – all editions
SQL Server 2005 – all editions
SQL Server 2000 (only local backups, not remote)

OS Support:
Win2000, WinXP, Win2003, Windows Vista, Win2008, Windows 7


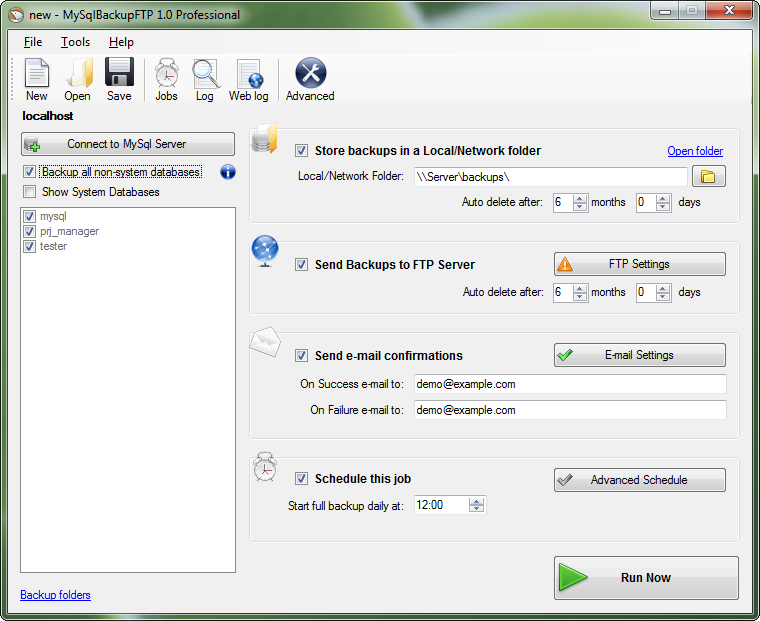
If you want to backup your mySQL databases you can use MySqlBackupFTP (freeware) -> http://www.mysqlbackupftp.com/

Saturday, October 20, 2012

Easy method os shared drive on Windows 7 for ESXi 5

How to Connect Windows 7 Share with haneWIN NFS to VMware ESXi Server Storage

You can use Windows 7 partitions and folders with haneWIN NFS as network storage to VMware ESX or ESXi servers without any hardware devices. It’s very simple and easy way to extend data store with Windows shares in testing environment or home use. This post shows how to connect Windows 7 share with haneWIN NFS to VMware ESXi server storage.

I already covered a post about setting up NFS share on Windows 7 with haneWIN and now let’s see how to mount it in vSphere. Read the previous post and make sure all set up and running.

Yes, this will not be ideal in production environment, but still it can be used as a backup storage. Before continue further steps make sure to meet following requirements.
1) Network connectivity between VMware ESXi server and Windows 7.
2) Windows firewall is switched off or exception given for NFS services on Windows 7.

See Also
How to connect FreeNAS iSCSI disks to VMware ESXi
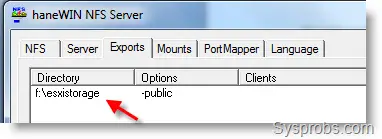
Here is the recap of NFS share I did setup for VMware storage.


connect Windows 7 Share to VMware ESXi
My F drive properties as shown below.


connect Windows 7 Share to VMware ESXi
1) Open vSphere client, go to Configuration tab and click on Storage.


connect Windows 7 Share to VMware ESXi
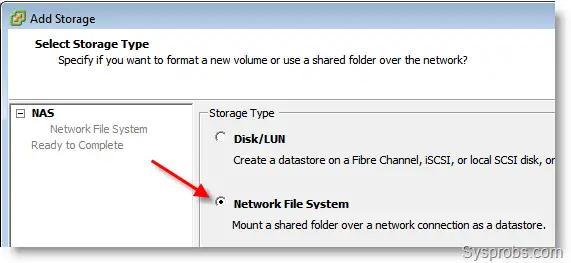
2) Click on ‘Add storage’ at top right. Select second option Network File System.
connect Windows 7 Share to VMware ESXi
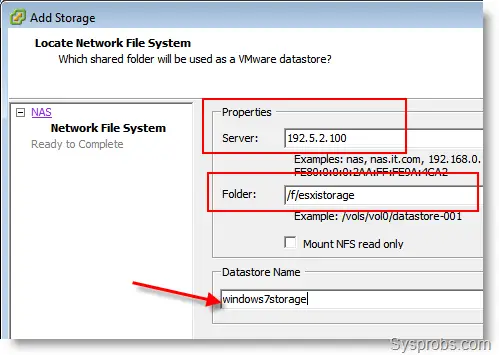
3) My Windows 7 host haneWIN NFS server IP is 192.5.2.100.
So, type IP address in server location.

Folder name (Shared directory) should be typed as shown below.


connect Windows 7 Share to VMware ESXi
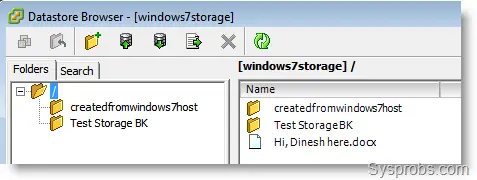
4) Click Next and OK. That’s it. Added Windows 7 share NFS will appear under VMware ESXi storage. It picks up the Windows partition capacity and free space.
If you don’t mount this as ‘Read only’, then you can use this as full fledge storage to install Operating Systems and save files.


added_storage
The good thing is, same storage (actually a Windows folder) can be accessed in Windows 7 explorer too. So, it’s easy to transfer data.


from_windows 

source: http://www.sysprobs.com/connect-windows-7-share-hanewin-nfs-vmware-esxi-server-storage

Tuesday, October 16, 2012

How setup a Windows share as a vmware ESX datastore

To get shell access locally, see bottom of page....

Enabling and Accessing Tech Support Mode

To enable local or remote TSM from the vSphere Client:

  1. Select the host and click the Configuration tab.
  2. Click Security Profile > Properties.

    In ESXi 5.x, select SSH or ESXi Shell and click Options.
    In ESXi 4.1, select Local Tech Support or Remote Tech Support (SSH) and click Options.

  3. Choose the desired startup policy and click Start, then click OK.
  4. Verify that the daemon selected in step 3 shows as running in the Services Properties window. 
*********************************************************************************************************

To enable root login for SSH and SCP clients:
  1. If you have physical access to the ESX host, login to the console of your ESX host as the root user. If you can only connect to the ESX host over the network, connect using an SSH client (such as PuTTY) and log in as a user other than root.

    To create a user in ESX host for using a SSH client:
    1. Log in to the vSphere Client as a root user.
    2. Click Users & Groups.
    3. Right-click on a blank area and click Add.
    4. Enter a username and password. Confirm your password.

      Note: Starting in ESX 4.0, the password needs to be at least 8 characters in length.

    5. Select Grant shell access to this user and click OK.
  2. After you are logged in SSH session, switch to the root user with the command:

    su -Note: If you do not have any other users on the ESX host, you can create a new user by connecting directly to the ESX host with VMware Infrastructure (VI) or vSphere Client. Go to the Users & Groups tab, right-click on the Users list and select Add to open the Add New User dialog. Ensure that the Grant shell access to this user option is selected. These options are only available when connecting to the ESX host directly. They are not available if connecting to vCenter Server.
  3. Edit the configuration file for SSH with the command:

    nano /etc/ssh/sshd_config
  4. Find the line that starts with PermitRootLogin and change the no to yes. You can find this line about 2 pages down from the top.
  5. Save the file by first pressing Ctrl-O and then Enter.
  6. Exit with Ctrl-X.
  7. Restart the sshd service with the command:

    service sshd restartNote: Alternatively, use the command:

    /etc/init.d/sshd restart

src1: http://kb.vmware.com/selfservice/microsites/search.do?cmd=displayKC&docType=kc&externalId=8375637&sliceId=2&docTypeID=DT_KB_1_1&dialogID=459226599&stateId=1%200%20459240961 

src2: http://kb.vmware.com/selfservice/microsites/search.do?cmd=displayKC&docType=kc&docTypeID=DT_KB_1_1&externalId=1017910

 ************************************************************************************


I keep all my OS and software media as ISO files on my PC.  At work we have an ISO library on a filer NAS share.  When creating virtual machines on ESX it’s much more efficient to install OS’s and applications by mounting an ISO image.  Its possible to connect to window shares from your ESX servers to access and mount your ISO’s


First you need to enable samba services on your ESX server’s firewall:
(from the ESX server console)

esxcfg-firewall -e smbClient

Next you need to create a location for your mount point.  Because the “vmimages” folder is visable from VirtualCenter, put the mount point in that folder

mkdir /vmimages/iso

Next you need to enable netfs – netfs is a file system interface to the networking stack of the ESX OS

chkconfig netfs on
service netfs start


Now you can mount the share in ESX.  Make sure the username you use is valid on the Windows host.  If its a domain member, use the “domainusername” format

mount -t smbfs -o username=<enter username>,password=<enter password> //servername/sharename /vmimages/iso

Now browse to the vmimages folder under your datastore and there you have it

src: http://www.tonydimaggio.com/blog/2008/02/28/connecting-to-windows-share-from-esx-server/

***************************************************************************

Shell
If you’ve used VMware ESX in the past, you’ll know that one of the most useful administrative features is the Red Hat based console used to interact with the ESX host. With the introduction of VMware’s console-less hypervisor ESXi, many of us were left trying to find ways to accomplish familiar tasks in a shell-less environment.
Fortunately word has gotten out that contrary to VMware marketing, ESXi does include a limited shell which can be accessed in times of need. This shell is actually the open-source BusyBox, which includes among other tools an ssh client/server. To access this shell and enable remote ssh logins, follow the steps below. Note: This assumes you have physical (or console based) access to the ESXi host.
    1) After booting into ESXi, go to the console screen of the host and press the buttons ALT-F1 which will take you another console terminal screen.
    2) Type the word “unsupported” and hit enter at this screen. Note: character echoing is turned off so you will not see what you are typing.
    3) A prompt will appear explaining you are entering “Tech Support Mode”, please read it carefully and understand what you are agreeing to. Enter the root password and hit enter.
    4) To enable sshd, type “vi /etc/inted.conf”
    5) Find the line that begins with ssh and delete the “#” at the beginning. (I assume you know vi editor commands)
    6) Save the file and find the inted service by typing “ps | grep inetd”.
    7) Kill the inetd process by typing “kill -9 process id from step 6
    8) The inetd process will now restart and the sshd service will be enabled. You can now use an ssh client to access the ESXi host as root.


How to Reset your VMware ESX Server root password

Just like every other password, it is inevitable that, eventually, you will loose or forget the root password to one of your VMware ESX Server systems. So how do you reset your VMware ESX Server root password? Let's find out...

1. Shutdown and Reboot your VMware ESX Server

If you don't know the VMware ESX Server root password, you don't know any passwords for root-equivalent accounts, and your virtual center server also does not have it cached, the only way to change the root user password is to first shutdown / power off your VMware ESX Server.

2. Press "a" to modify the kernel arguments

As soon as you see the GRUB boot screen, press "a" to modify the kernel arguments, like this:

3. Enter single user mode

At the end of the kernel arguments command line, type "single" and press Enter, like this:

4. Change the root password

Now, change the root password using the passwd command, like this:


You will need to enter the new root password twice.

5. Reboot the ESX Server

Once you have reset the root password, reboot the server to go back into multi-user mode.

6. Verify the new password

Once the system reboots, verify that the new root password works, like this:
In Summary

Resetting the VMware ESX Server root password is not difficult but you will have to bring down the server, enter single user mode, use the passwd command, and reboot to get the task completed.

src: http://www.petri.co.il/vmware-esx-server-root-password-reset-recovery-lost.htm